Set up as a solo agent: your first week
A nine-step checklist that gets a new solo account tracking, with a link to the detailed guide for each step.
You do not need to fill everything in on day one. This is the order that gets your Dashboard tracking, with a link to the detailed guide for each step. Steps 1 through 3 and step 8 are one-time setup; the rest are habits.
The checklist
-
Accept your invite and choose Solo Agent. Open the invitation email, fill in the Complete your account page, and when setup asks How do you work?, pick Solo Agent. This sets the account up as a one-person business. Guide: Accept your invite and set up your account.
-
Set your goals. Setup asks for an Annual GCI target and a Weekly conversations target. Then open Goals, fill in the rest under Set Goals, including the Activity Goals, and select Save Goal. Every ring on the Dashboard measures against these numbers; a blank target is a ring with nothing to pace. Guide: Set goals and track your pace.
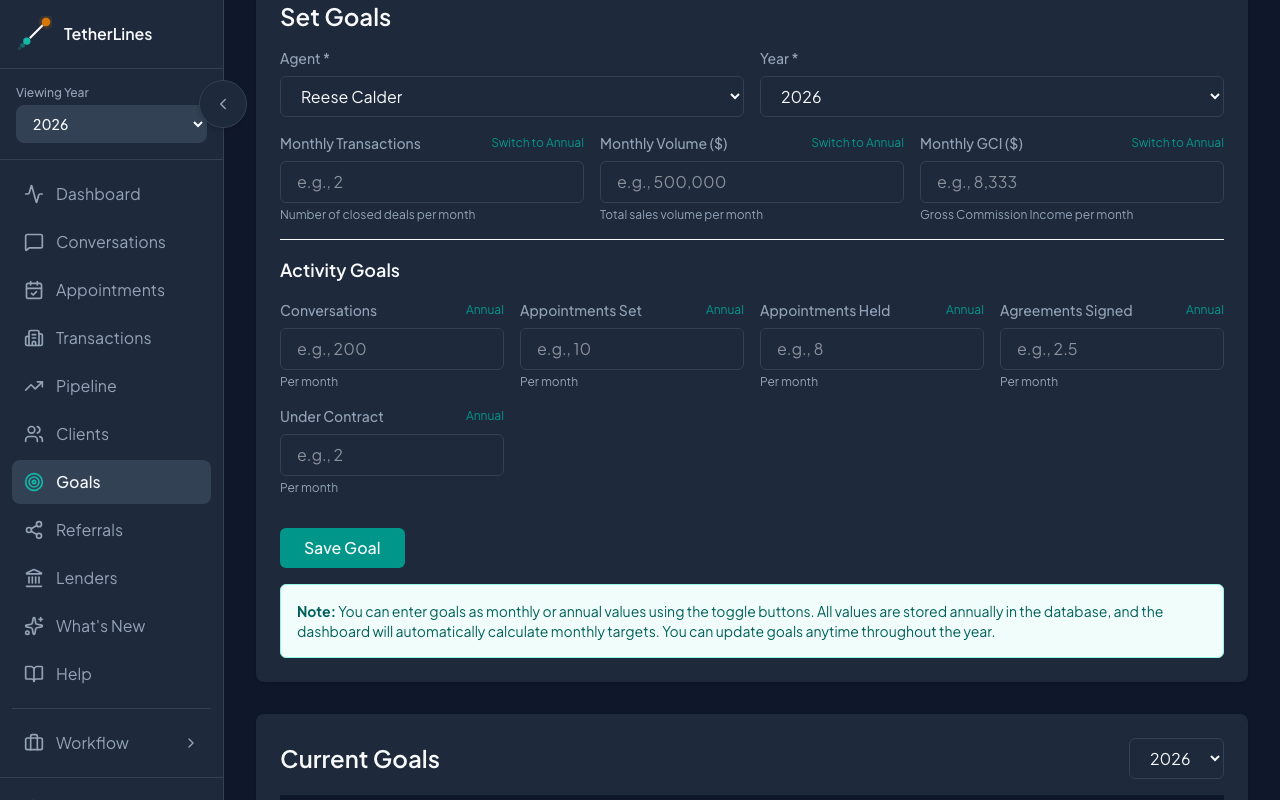 The Set Goals form: each target has its own monthly or annual toggle
 -
Check your lead sources. Open Settings at the bottom of the sidebar, then the Lead Sources tab. The defaults cover most businesses; select Add Source for anything you track that is missing. Each client and each transaction picks a source from this list (a transaction starts with its client's source), and the Dashboard's Transaction Sources table counts closed transactions by source, so settle the list before you add people. Guide: Lead sources, notifications, and your account.
-
Add your clients and tag the source. On Clients, select + Add Client and choose a Source for each person. Start with the people you are actively working with, not your whole database. The source is what ties later appointments and transactions back to where the business came from. Guide: Add a client and tag the source.
-
Log this week's conversations. On Conversations, pick the week, enter a count for each day, and select Save Week. Conversations are the leading indicator, and the Conversations ring only moves when you log them. Guide: Log your conversations.
-
Schedule your appointments. On Appointments, select + Schedule Appointment and link each one to a client. Appointments set and held flow straight into the Appointments Set and Appointments Held rings. Guide: Schedule an appointment.
-
Log live transactions and your pipeline. Anything under agreement goes in Transactions with + Add Transaction. Opportunities that are not there yet go in Pipeline, grouped as 30 Days, 60 Days, 90 Days, or Nurture. Transactions drive volume and GCI as they move toward closing, and the pipeline keeps early opportunities visible so they do not go quiet. Guides: Log a transaction and its commission and Move a client through your pipeline.
-
Install on your phone and turn on reminders. Add TetherLines to your home screen from Safari on iPhone or Chrome on Android, sign in inside the installed app, then open Settings, the Notifications tab, and enable Task reminders on this device. Logging is a daily habit, and a habit needs the app within reach. Guide: Install TetherLines on your phone.
-
Read your pace on the Dashboard. Back on Dashboard, check that Viewing Year in the sidebar shows the current year, then look at the KPIs section. Beneath each ring you will see Ahead by N, On pace, On pace, slipping, or The gap is N. This is the point of the setup: a small gap seen early is a small correction. Guide: Welcome to TetherLines.
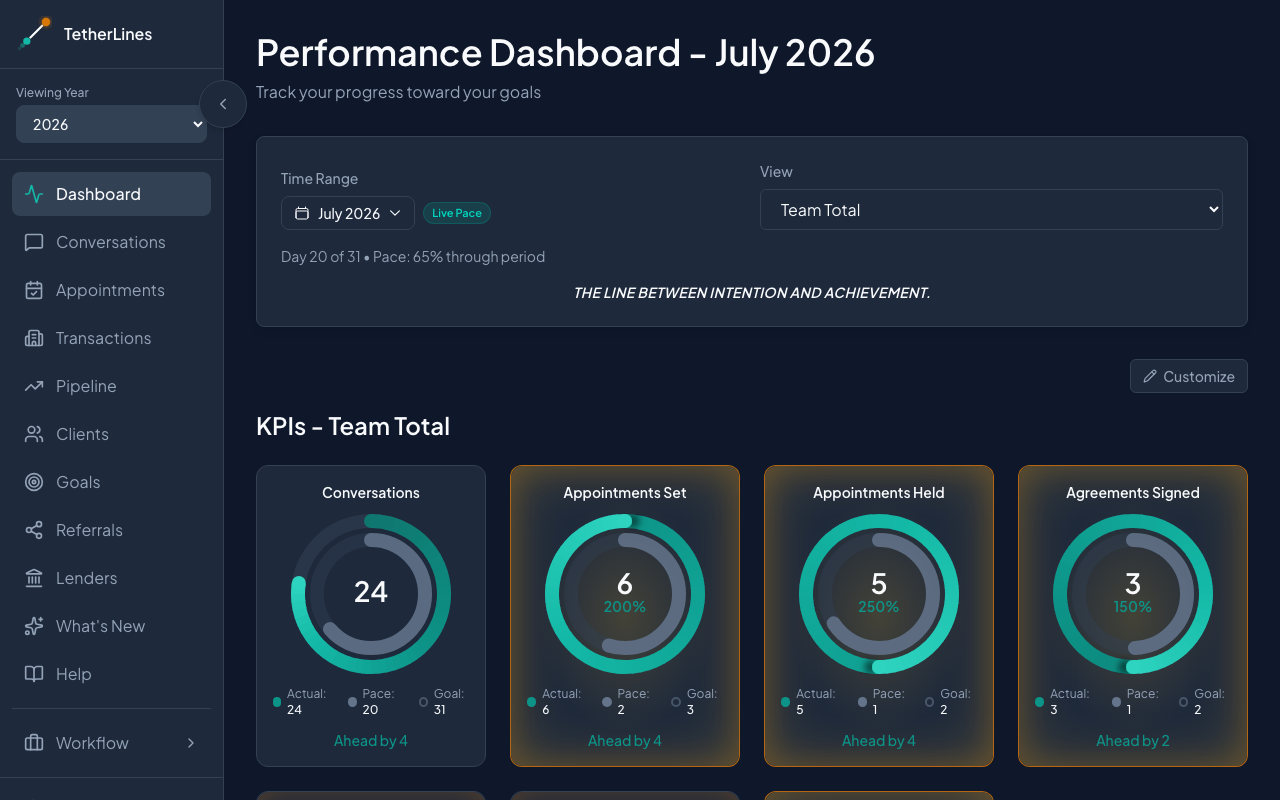 The Performance Dashboard: each KPI ring is measured against the goal and pace you set
What you can leave alone
- Team Splits in Settings needs no changes. As a solo agent your percentages are already 100%.
- The Welcome to TetherLines card on a brand-new Dashboard links to four of these steps: Set your goals, Add your first contact, Log an appointment, and Record a deal. Use it as a shortcut or dismiss it.
Where to go next
- Close a transaction and see GCI update when the first deal reaches closing.
- Set goals and track your pace to adjust targets once real numbers are in.
One goal, one client, and one week of conversations are enough to start. The rest fills in as you work.